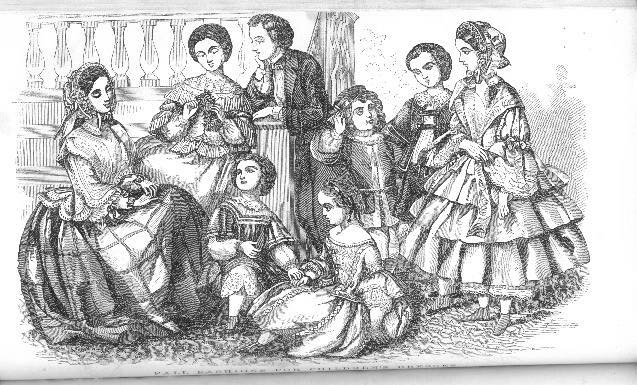
This is something I made Linnea a while ago, when I was on a 1838-1840 kick. I'm aware that this is painfully specific, but I was intrigued by the sleeves that were in vogue at the time. The bodice decorations can be fascinating too.
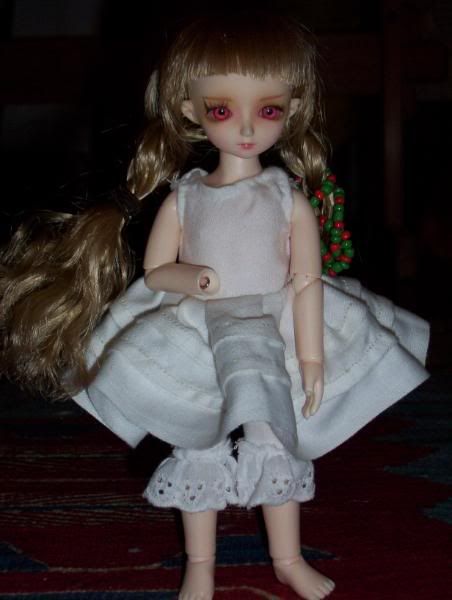
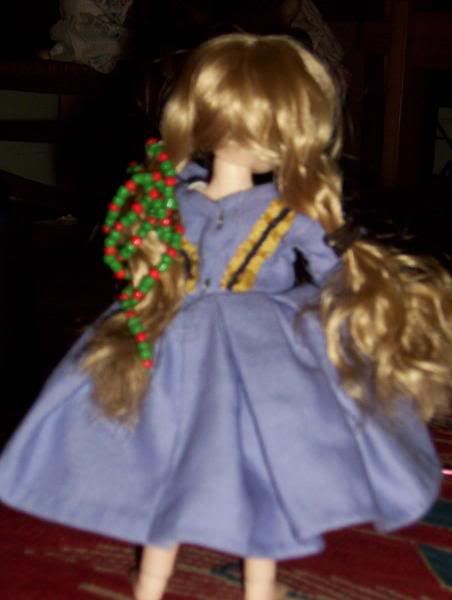
This is the second dress of this time period I made. The first dress didn't have the delightfully puffy sleeves I was hoping for, so I hoped to make up for it in this one. The sleeves are cut into four pieces, tight upper sleeves, a cuff, big full lower sleeves and a ruffle to hide the join. It backfired a little in that the lower sleeves are too long and collapse upon themselves. Not the sort of look I wanted. Oh well.
The bodice has dropped shoulder and six pieces, with center back and side back pieces, and two parts in front. For this I added a box pleated ruffle. The skirt is plain and fluffs out wonderfully.
Beneath is a petticoat of plain white mystery fabric filled out with gathered panels of lace. By now I am fairly certain that tiered ruffled petticoats weren't period to this time, but it does the job well.
Showing posts with label Victorian. Show all posts
Saturday, March 9, 2013
Sunday, January 27, 2013
From the Early Days
This is one of the first things I made for
Anthea, cut from a torn velveteen pair of my pants and trimmed with
homemade trim made from yarn.
The skirt is dead simple, made from two trapezoids, a triangle, and a hook and eye. There's no waistband, I just turned down both ends and hemmed. It largely exists to preserve her modesty when she wears the top half of the outfit. The overgown is the star of the show.
What makes the outfit is the contrast of the white on black. The trim inspired by a gown from Patterns of Fashion 3, particularly the curved back and the borders. For make it, I simply made crochet chains until I got the lengths I wanted. The frog balls are also crocheted, and the loops are bits of plain yarn with knots at the end.
Here, she also sports a cap and shawl. As a girl who hates the cold, layers are adored. The cap is called a sortie, and comes from the Godey's Ladies Book, by way of Koshka the Cat. To make it her scale, I did trial and error until it looked right. The shawl is a rectangle of knitted cotton in a basket weave stitch, with fringes at the ends.
The skirt is dead simple, made from two trapezoids, a triangle, and a hook and eye. There's no waistband, I just turned down both ends and hemmed. It largely exists to preserve her modesty when she wears the top half of the outfit. The overgown is the star of the show.
What makes the outfit is the contrast of the white on black. The trim inspired by a gown from Patterns of Fashion 3, particularly the curved back and the borders. For make it, I simply made crochet chains until I got the lengths I wanted. The frog balls are also crocheted, and the loops are bits of plain yarn with knots at the end.
Here, she also sports a cap and shawl. As a girl who hates the cold, layers are adored. The cap is called a sortie, and comes from the Godey's Ladies Book, by way of Koshka the Cat. To make it her scale, I did trial and error until it looked right. The shawl is a rectangle of knitted cotton in a basket weave stitch, with fringes at the ends.
Friday, December 14, 2012
Bustle Action
This is embarrassingly one of those outfits that took years to complete. My attention span was all over the place, and I lost a lot of interest after it was about 80% assembled.
The inspiration was from Kendra Van Cleave's take on a dress from Patterns of Fashion 1. The elaborately ruched skirt front was my main motivation to make the outfit, and I had an iridescent taffeta that would show off the gathering nicely. Another motivation for the outfit was to make a bustle top that I tried to make once before from an old Peterson's magazine, but I misread the pattern, and it turned out differently. Nice, but not what I initially wanted.
From time to time I would get motivated and attach a collar, set in sleeves, or a hook and eye, but for the most part it sat in my "to be completed" pile. A doll meet finally motivated me to finish, so I put in the snaps, and here we are.
Pictures ahoy!
The inspiration was from Kendra Van Cleave's take on a dress from Patterns of Fashion 1. The elaborately ruched skirt front was my main motivation to make the outfit, and I had an iridescent taffeta that would show off the gathering nicely. Another motivation for the outfit was to make a bustle top that I tried to make once before from an old Peterson's magazine, but I misread the pattern, and it turned out differently. Nice, but not what I initially wanted.
From time to time I would get motivated and attach a collar, set in sleeves, or a hook and eye, but for the most part it sat in my "to be completed" pile. A doll meet finally motivated me to finish, so I put in the snaps, and here we are.
Pictures ahoy!
Thursday, November 29, 2012
Red and white with ribbon
When I saw this apron pattern on http://www.thesewingacademy.com/, I knew it would make an excellent jumper for a Tiny. I still have a lot of ribbon print material after I made this shalwar kameez, so I used some and put together a coordinating red shirt from what used to be a shoe bag. This dress looks terrible without a a discernable waist, but that is nothing a generous sized bit of red ribbon can't fix.
Friday, October 26, 2012
With apologies to Demode...
The outfit here was inspired my the skirt of this ensemble. As it so happens, the pattern for the skirt comes from a book in have, so I went to Patterns of Fashion and copied the elaborate gathered front, which I mounted to a plain back for stability. Instead of trying to create the elaborate folded trim in 1:4 scale, I went for box pleats.
The top was inspired by the pattern of this outfit. Largely, I wanted an overskirt that was huge and poofy enough to be its own bustle. This turned out to be just as well, as the skirt was too narrow for the bustle petticoat to fit. To match the skirt, the top also has a pleated trim.
More pictures below.
The top was inspired by the pattern of this outfit. Largely, I wanted an overskirt that was huge and poofy enough to be its own bustle. This turned out to be just as well, as the skirt was too narrow for the bustle petticoat to fit. To match the skirt, the top also has a pleated trim.
Annoyingly, the skirt front isn't too visible when Anthea's standing,
but as she sits most of the time, you get to see the details.
Friday, October 5, 2012
Anatomy of a Bustle Outfit
This is one of the first Victorian outfits I made for Anthea. For a long time, I wanted to put her in late bustle era clothes, but I could not figure out how to made the centaur type skirts that would entail. After a while, I decided that softer early bustle outfits would be easier, so that's where I went.
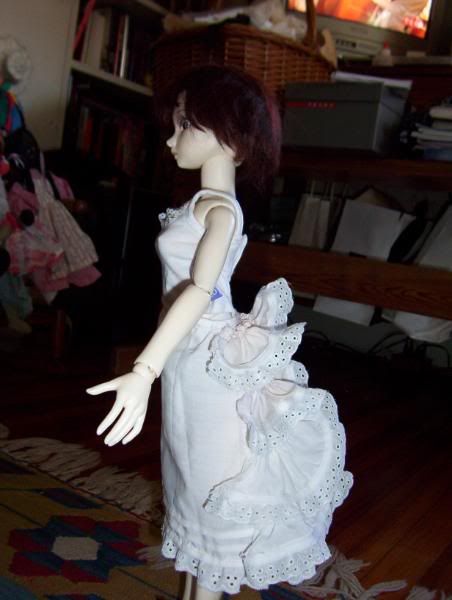
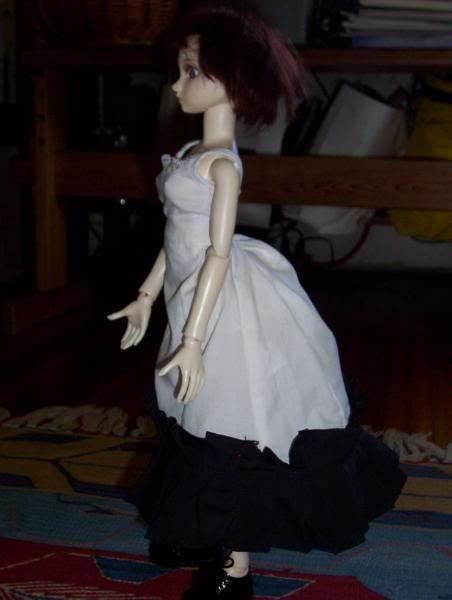
Courtesy of Festive Attyre's fashion plates, I chose this skirt pattern, and used it for both the outer skirt and petticoat. The trouble was that I was taking apart a dress of min to put the petticoat together, and I didn't have much of it. The bum ruffles were in danger of being too short. I rectified this by adding eyelet ruffles to the bottom hems, which helped things stick out quite a bit. The bottom is decorated with two pintucks and more eyelet.
The skirt itself is not that remarkable, as its' a plain gored skirt with a really big pleated ruffle at the bottom. Still, it fluffs out nicely, doesn't it?
The top was inspired by this pattern. It wasn't until much later that I realized that I didn't follow the pattern as closely as I wanted (I stitched up seams that were meant to be loose,) but I like how it turned out. I used beads to mimic buttons and highlight the side pleats.
Courtesy of Festive Attyre's fashion plates, I chose this skirt pattern, and used it for both the outer skirt and petticoat. The trouble was that I was taking apart a dress of min to put the petticoat together, and I didn't have much of it. The bum ruffles were in danger of being too short. I rectified this by adding eyelet ruffles to the bottom hems, which helped things stick out quite a bit. The bottom is decorated with two pintucks and more eyelet.
The skirt itself is not that remarkable, as its' a plain gored skirt with a really big pleated ruffle at the bottom. Still, it fluffs out nicely, doesn't it?
The top was inspired by this pattern. It wasn't until much later that I realized that I didn't follow the pattern as closely as I wanted (I stitched up seams that were meant to be loose,) but I like how it turned out. I used beads to mimic buttons and highlight the side pleats.
Saturday, March 3, 2012
Mariko's Old Fashioned Dress.
After spending a little too much time on this lovely woman's website, I got it into my head to make a mid Victorian outfit for Mariko.* According to my research, the shoulders should be dropped, the skirt full, the petticoat stiff, and the drawers should peek out from the bottom. aside from that, there were several bodice and sleeve designs to choose from. I chose a plain ungathered bodice with a jewel neckline and full bishop sleeves (and later worked myself into a near panic after the dress was done as I could not find evidence of bishop sleeves on children. Sigh.)
First, I made the underdress. I draped the bodice on Mariko, stitched it up (hemming shoulders is so annoying on this scale,) cut out the skirt, added the pintucks for stiffness, and sewed the drawers to the entire thing to reduce bulk at the waist.
The bodice for the dress I took from the 1860's bodice from Patterns of Fashion volume 1, which was almost exactly Mariko's size. For decoration, I took inspiration from the girl on the far right. The trim was made with chain crochet stitched on top of some ribbon I had lying around. It later occurred to me that the cuffs might have been better off in plain white rather then echoing the trim, but I had no desire to take apart the entire thing for a little detail like that.
The only major hiccup is that her right hand could not fit through the armscythe. I had to take off her hand and add an S-hook so that it can be easily removed when she goes in and out of it.
What do you think?
*Actually, I made two dresses, but the second one is very plain, so I have few photos of it.
First, I made the underdress. I draped the bodice on Mariko, stitched it up (hemming shoulders is so annoying on this scale,) cut out the skirt, added the pintucks for stiffness, and sewed the drawers to the entire thing to reduce bulk at the waist.
The bodice for the dress I took from the 1860's bodice from Patterns of Fashion volume 1, which was almost exactly Mariko's size. For decoration, I took inspiration from the girl on the far right. The trim was made with chain crochet stitched on top of some ribbon I had lying around. It later occurred to me that the cuffs might have been better off in plain white rather then echoing the trim, but I had no desire to take apart the entire thing for a little detail like that.
The only major hiccup is that her right hand could not fit through the armscythe. I had to take off her hand and add an S-hook so that it can be easily removed when she goes in and out of it.
What do you think?
*Actually, I made two dresses, but the second one is very plain, so I have few photos of it.
Wednesday, December 21, 2011
Layers
I like historical costuming. To me its like a puzzle trying to figure out an aesthetic and recreating the look. I try to make my things on the side of authentic. That said, there are things I am lenient on. Fabrics that look good on a human does not always work for a doll. Reproduction materials are not always affordable. When it comes to the proper undergarments, my dolls don't wear very many.
The purpose of the shift is to keep sweat, oils and other bodily grime off of the good clothes. Dolls do not create these things, so I usually bypass this layer. Depending on the era, I don't do corsets either. Resin is not squishy, so corsets would fail to compress and lift.
I do use petticoats though. It effects the hang and fluffiness of the dress, and I enjoy decorating them. Here's an example:
I enjoy making pintucks, and adding ruffled eyelet adds stiffness and poof. Together, we have prettiness.
The purpose of the shift is to keep sweat, oils and other bodily grime off of the good clothes. Dolls do not create these things, so I usually bypass this layer. Depending on the era, I don't do corsets either. Resin is not squishy, so corsets would fail to compress and lift.
I do use petticoats though. It effects the hang and fluffiness of the dress, and I enjoy decorating them. Here's an example:
I enjoy making pintucks, and adding ruffled eyelet adds stiffness and poof. Together, we have prettiness.
Monday, December 19, 2011
The Waif
This girl is Anthea. She was a character I created for a now long defunct online game. I liked the character enough and fit the theme of my other girls enough that I started looking for a mold that fit my image of her. Doll in Mind Marianne fit the closest.
Anthea is supposed to be a Victorian girl, though I am adamant that her hair be severely bobbed. This is because she is partially based off of this portrait of Bia Medici. I like bustle outfits on Anthea best, though I've made clothes from other eras for her as well. With her, the general rule is black, white, grey and in rare cases purple.
Subscribe to:
Posts (Atom)