Wednesday, May 30, 2012

When Geekdoms Collide

Of the video games I have a soft spot for, the Assassin's Creed series is one of them, especially from AC2 and onward. After Kozu made her arrival, first things I made for her was an outfit from Florence circa 1490.* This involved lurking the Festive Attyre and Realm of Venus pages staring at paintings and what other costumers did. I draped the bodice portion of the dress on Kozu, used calculations to pattern the camica (undershirt,) and the ginorea was made out of trapezoids and blind guessing as I couldn't figure the layout. The sleeves were drafted by me, and made reversible for multiple looks.

Since I was away from my machine at the time, the camica is entirely hand sewn the old fashioned way. I hemmed the parts individually and whipped them together. The same was done for the bodice of the gown. The long interior seams of the skirt was done by machine, but hemmed by hand and cartridge pleated. By my sewing math, the pleats ended up being spaced at .3 centimeters apart, which was a pain to mark. The ginorea binding and interior seams on the sleeves are also machine done.

As a final touch, I bought and styled a wig to match the side waves of the ladies in the paintings. Annoyingly, the wig I ordered was supposed to be "honey blond" and arrived closer to "platinum." Oh well. At least Kozu doesn't seem to mind.

Here are the pictures of Kozu resembling an AC2 background character. . Please ignore the hanging threads.


*At the time, I thought the game started in that year, and looked at paintings from that time. A great many moons later, I found out that the game starts in 1480. Sigh. On the bright side, there wasn't that much difference between the two years.

Thursday, May 24, 2012

A Personal Favorite

On account of Frederica's love of looking serious and grown-up, I set out to make her a variety of suits and old fashioned wear. My first trip was unsurprisingly to a Bleuette pattern site where I combed the pages, looking for designs that had what I was looking for. This was one of my first creations.

The jacket was what really caught my eye. With side front and side back seams, it looked like an ideal candidate for piping. Even better was that I had the perfect fabric on hand in the form of a fat quarter with brightly colored Asian toys on a black background. my stash of plain black fabric would serve as the main body of the jacket and the fat quarter would serve as jacket accents and the dress. All I needed to buy was piping.


By contrast, the dress underneath was unremarkable. Instead of copying and redrafting the pattern to fit a larger size like I did for the jacket, I pulled out a pattern I already had. It's essentially a sleeveless, A-line hip length bodice with a pleated skirt.

Incidentally, this was my first time working with piping. I used my zipper foot like my machine manual said, but it did not sit as closely to the seam as I'd like. Fortunately few people are as picky as me or likely to look at it that close up.

Sunday, May 20, 2012

A Parade of Uniforms

I have a soft spot for uniforms. I had absolutely no desire to wear one as a student, but for cosplay or as something to put my girls in, I love playing with designs. Most of these are my own creations, but a couple are cosplay outfits.

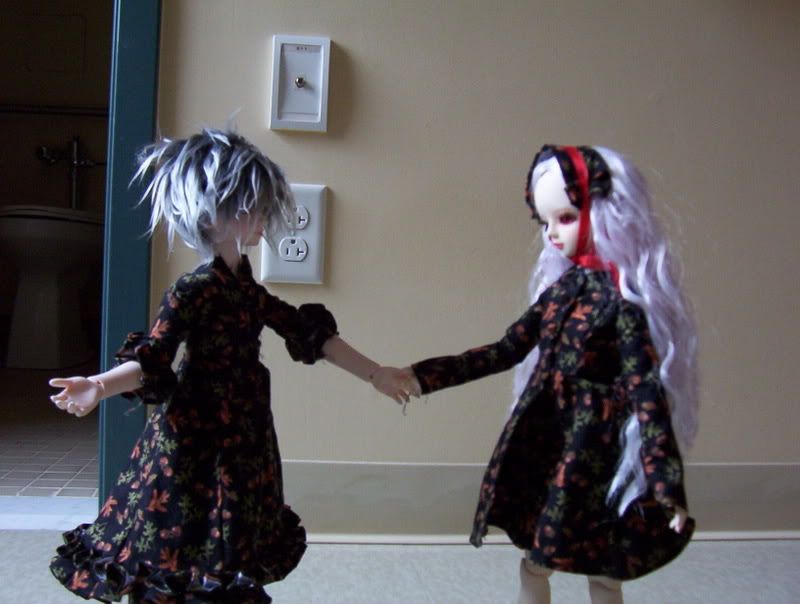
Here are Dalya and Lilja. The former is sporting a jumper I'm really pleased with. The fabric is nice and I love how full the skirt is. A shirt with full sleeves and a big round collar compliment the look.

Lilja is cosplaying the uniform from the game Katawa Shoujo. The shirt in the game is rather complex, but I simplified things by just topstitching the princess lines rather than cutting them out. The skirt is supposed to be solid rather than striped, but the developers said that the school allows some level of customization with student's clothes, and this was the closest material I had. The ribbon is a bit of decoration pinned to my sewing kit that occasionally cameos on this ensemble.

Now it's Yu Wei, Mariko, and Yu Lian's turn to show off. Yu Wei's jacket isn't as fun as I thought it would be, but it might be more flattering on someone else. My favorite part of the outfit is the skirt anyway. Mariko's was initially for Calla, but it came out way too small. Her skirt is a ribbon I pleated and added a hook and eye to.


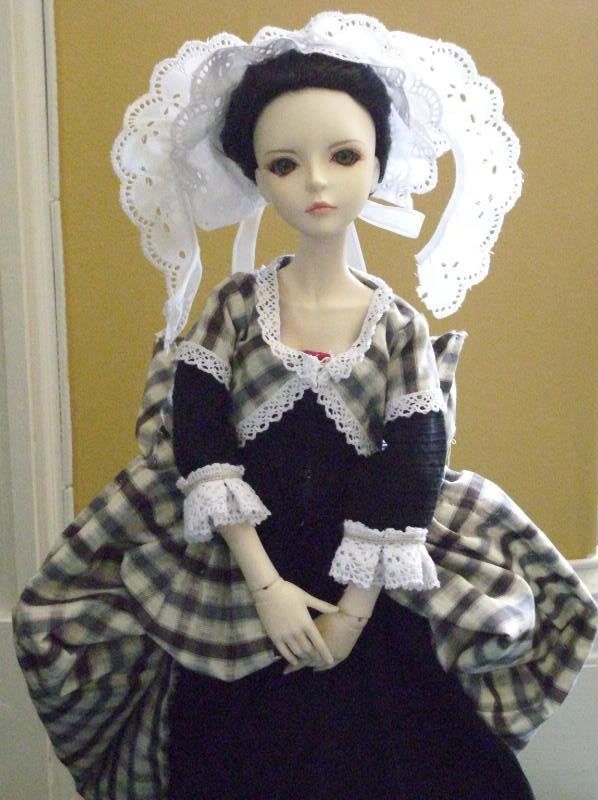
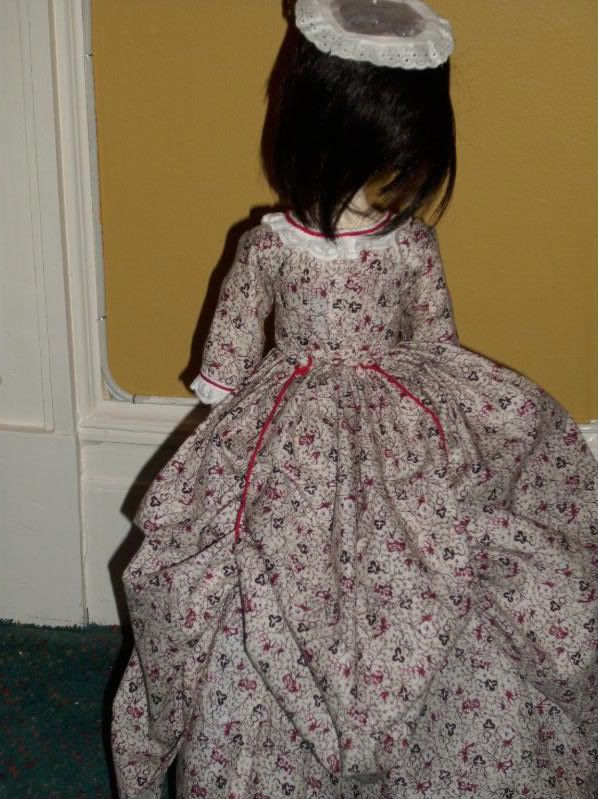
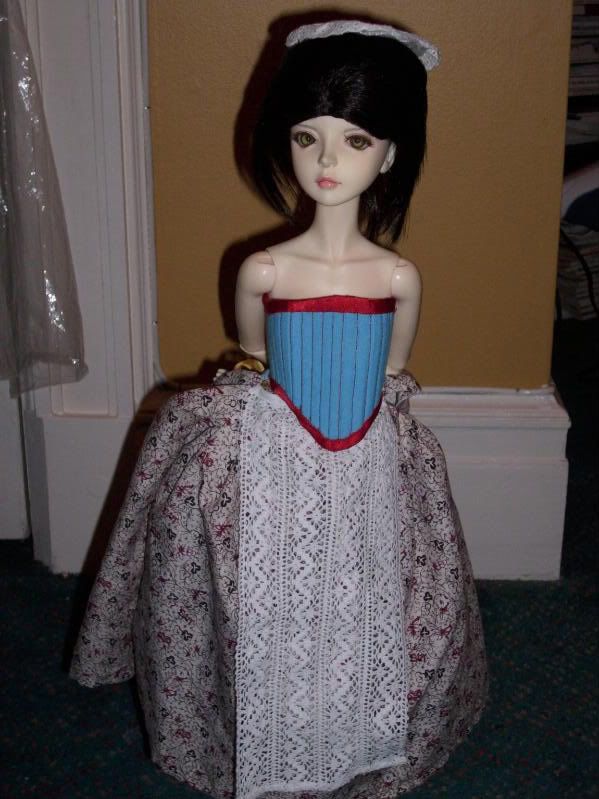
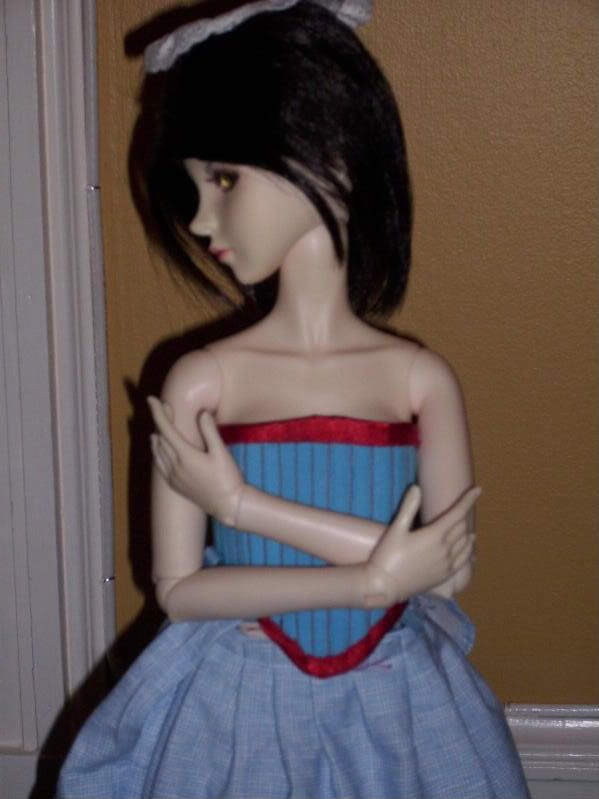
Yu Lian's clothes are my attempt at an Alice in Wonderland style uniform. The high collar of her shirt are supposed to lend a serious official air to something that is usually whimsical. There are also pintucks, but that's hard to see beneath the apron. I was seriously waffling on how to include the pinafore into the design, but one of my friends assured me that aprons used to (maybe they still are?) be common elements on girl's uniforms in parts of Eastern Europe. Again, for formality's sake I made it double breasted. The pattern for it I took from Tudor Links The skirt is just another version of the early bustle skirt I've made umpteen times now.

This is what I consider to be Mariko's kindergarten uniform. It got stained some time ago and I haven't yet gotten around to fixing it. Isn't it adorable? It's a jumper with a smock on top.


Summer editions!

Part two, containing non homemade uniforms, is posted here.

Thursday, May 17, 2012

Two Breaths of Autumn

Here's some old ones from back in my undergrad days. I purchased a yard or so of some pretty black cloth with oak leaves on it, and I had a good idea as to what to do with it. Princess seams would be involved, as well as copious amounts of ruffles. Alas, this was my first time with princess seams and I didn't do any mockups. The resulting dresses were too wide, and I had to take in quite a few seams.

I had a lot more success with the ruffles. They're time consuming, but an inexpensive way to make an outfit fluffy. I had a bit of material left over from the ruffles that I didn't know what to do with, so I put tucks on each side, stitched a ribbon to it and made a headdress.


Yu Lian is modeling the simpler dress with a box ruffle around the hem.


Yu Wei's outfit is mildly risque as the front only buttons to the waist and is open past that. It never shows up in picture or in person so it doesn't bother me. All her ruffles are gathered in the back, on a straight panel of material with the back princess seams only on the bodice portion. 

Rufflebutt!

The buttonholes defeated me quite well. I tried doing them on the machine, but something went rather wrong, and the stitches came loose as I pulled the buttons in and out.  Now the fronts of these dresses are pretty fragile, and the clothes are in retirement until I can think of a way to restore them.

Sunday, May 6, 2012

Rococo Robe

Or, my fondness for lovely things strikes again.


What you see here is Linnea sporting a robe a la turque. It's not something costumers do terribly often, and I wanted one for myself. I figured I should make one on a smaller scale as practice first. Linnea's design scheme is very close to what I want for myself, the main difference is that mine will have black and white stripes instead of plaid.

On her head is a cap known as a barbe. By the time the Turque emerged on the style scene, this hat wasn't so posh, but I think it's pretty, so I went with it. It stays on her head with the help of a straight pin.

Here she demonstrates an alternate way of wearing your fine gowns. If you pull the ends through the skirt's pocket slits, you look fluffy and keep you clothes clear from the mud.

Linnea Layer by Layer

I have an undeniably soft spot for Rococo clothes. My first attempts were definitely stylized with only pretensions to accuracy. As I got better and more confident with a needle, I wanted to do something more intensive. Here is my end result.


What you see here is Linnea sporting a polonaise. This outfit's claim to fame is the looping mechanism that hitches the skirt into swags, keeping it free of the dirty ground. I made it with a coordinating petticoat. Her accessories include a lace apron that was a popular way of displaying yet more wealth. I made it by whipping several lengths of insertion together. On top she sports a tiny pinner cap.


Beneath the gown we get a good look at her corset. Though there are patterns for this type online that are human sized, I had a miserable time trying to scale it down to fit her. By serendipity, someone on Den of Angels had a 60cm scale corset pattern and shared it. It's made from scraps of canvas and boned with cable ties. While it doesn't reshape her resin, it does provide a nice flat surface for bodices to rest on.


We also see her petticoat and apron in more of their glory. As I don't want to cover the point of her bodice, the apron goes beneath the gown.

Here she is in her under petticoat. I put tucks in it to add stiffness and enhance the overall fluffy look of her skirts. This is made from a sheet that I converted into mockup fabric.


Beneath this we get to see...


Linnea- No more.

Wednesday, May 2, 2012

First layer accomplished

There is a running gag amongst the online costuming community about Costume ADD. I am no exception. Dolls can make this worse, as even tiny scraps can be turned into something for them, and they don't need an excuse to dress up. Then there's my fondness for historical clothing which covers many eras, and a plethora of pretty pictures for inspiration. I have a lot of projects that have yet to be completed.

One of my many grand plans is to create a doublet style overgown for Kozu, complete with kirtle, forepart, ruffs, and other things to make her look like a late Italian Renaissance noble. She will have multiple foreparts (something to peek through the split skirt of her gown,) and doublets which will be hand decorated with couched cord.

I started this project over a year ago, and I keep getting distracted. The doublets still aren't complete, and I decided to focus on one for now and worry about the rest later. The kirtle (underdress) isn't a very fun looking layer and I could not get excited about putting the bodice together. As it wasn't going to peek at all from under the outfit, I made it in plain muslin. Months and months pass before I finally hem the blasted thing, which must be done by hand due to all the tricky curves.

The skirt portion thankfully went by a lot faster. I took the farthingale pattern from The Tudor Tailor, stitched it together, fastened it to the bodice, and then added rows of cording to stiffen the hem. I'm not very sure how accurate stiff skirts are for this time and place, but I decided I liked the look. Tucking cords into the skirt isn't period either, but it was easy and got the job gone.

And now I have something to show: